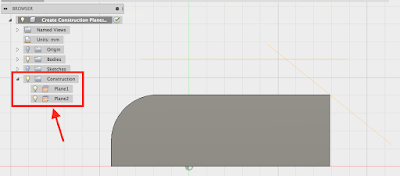
We're going to start by looking at constructing Planes.
I've selected that top surface and dragged the plane upward and keyed in a value of 20. You can see the plane has been added to the Construction folder in the Browser section. In this case it is called Plane1.
We will now try Plane At Angle. First click on Construct and then select Plane At Angle.
Click on the top right edge of the model.
Often better to view this side on. Click on the View Cube Front side.
Then I can drag that around and let's key in a value of 39 degrees. Click on OK.
On the original body there were no planes to create the next step of our design. Typically creating a Sketch on that plane. I will turn the planes off in order to continue.
Let's look at another one. Click on Construct and then select Tangent Plane.
Using the View Cube, turn the model at this corner.
Select the following face.
Using the View Cube, turn the model at this face: FRONT.
You can drag that BLUE circle to the sides to change the angle.
In the angle box, enter the value zero.
For drilling a hole normal to that surface. Currently normal, but I can change the angle. Let's set it back to zero.
Click on Home View.
Turn off the visibility of that plane.
Next one is going to be Midplane. We have seen this before. Click on Construct and then Midplane.
Rotate that around and select your planes. First the left side.
Then click on the right side.
And we now have a plane right through the middle.
So if it were an awkward size, that's a very good way to solve that problem.
So far, we have seen 4 planes. Now, let's take a look at Through Three Points. Click on Construct and then Plane Through Three Points.
You may have to construct points when you do this. Using the existing corners of this box as seen below.
Orbit around and have a look at the plane.
Click on Home and turn off this visibility.
I'm gonna turn off the visibility of the body and turn on the visibility of a Sketch that I created.
This is a Spline.
Click on Construct and then select Plane Along Path.
I'm thinking about using either the sweep or the loft to create a Sketch, normal to the end point of this spline. That's a little bit awkward but Plane Along Path solves that problem. Now depending on where you click, it's going to be close to the zero or one.
Orbit around. That's the overall length of this Spline. Change the Distance to 1 so that it's right at the very end. I could now go ahead and create the Sketch on that plane. There are the options as well.
As well as plane we have Axis and Point under Construct.
And you may use a combination of these to create the plane that you want.
At the end of this exercise, you should have: one body, one Sketch and six planes.


No comments:
Post a Comment