I need to hollow that out and then cut it into 2. One little tip here is to go to INSPECT and then Section Analysis.
Then go into the existing origin. So I'm going to take one of the plains. Just hover over them. The one I want is the YZ plane. Then click on OK.
That allows me to see inside that body through that plane.
And I can toggle that on and off.
Just close that down.
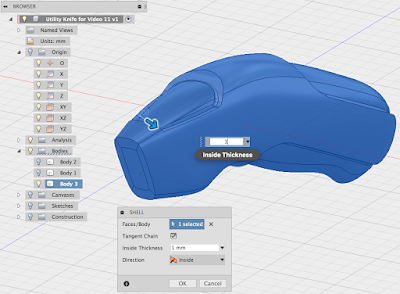
So, next thing I want to do is go to MODIFY and Shell.
Now if one opens faces, I would select them, but in this particular case I just want to select the body.
Generally easier if you just go into the Browser to select the body right there.
So having selected the body, key in the thickness of the Shell and it's going to be 1 mm. Did it actually Shell, well let's find out.
Let's go to Visual Style, and turn on Shaded with Hidden Edges.
And we can see a lot of hidden edges in there now.
And of course the Analysis that we did earlier on, really shows that I got that Shell component.
So what was a solid body just seconds ago has now been Shelled now to a 1 mm thickness.
Turn off the Section Analysis.
The next thing that I want to do, is I want to Split this particular body. The reason why I want to do that is because if we look at the finished product, one side is actually different that the other.
So on one side it is pretty much what I have, but on this side closest to us, there's an opening for a little slider of the utility knife. Ok, back to the one that I'm working on. Let's go to MODIFY, and now I want Split Body, there's also a Split face there so I'll make sure that you've got the Split body.
Select the body and the the Split Tool.
Now in this case I can go back to those Origin and get the YZ.
Click on OK. Turn on my Section Analysis.
You can kind of see that it is Split but I want to prove that.
So first select the body by clicking on Body 3 (1).
Then right-click on it and select Move/Copy.
And then drag on that and we can clearly see now that we have the split body.
Click on OK.
So we viewed Shell and we viewed Split on this particular project.
Going back to the Timeline, I don't need that Move so I'm going to go and delete that.
Click on Home on the View Cube and arrange your Browser to close all the options.


No comments:
Post a Comment